Shooting Progression Drill


Step 1:

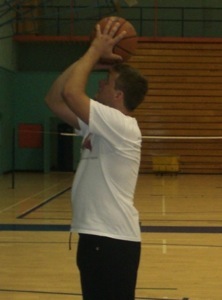
Shooting against backboard or the wall.


Teaching Cues:

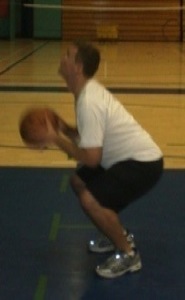
  1. -Shooting hand behind the ball, opposite hand on the side providing stability.

  2. -Elbow bent and extended over the same knee.

  3. -Same foot as shooting hand slightly forward.

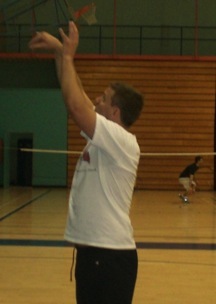
  4. -Working on getting back spin on the ball as you release.

  5. -Want to follow through with wrist flexed and arm straight (ex: reaching into cookie jar).

Step 3:

Shooting against backboard or the wall (with deep (exaggerated) knee bend.


Teaching Cues:

  1. -Same principles as steps 1 and 2.

  2. -Exaggerated knee bend ensures legs are part of the shot.

  3. -Continue to rise up onto the toes as ball is released.

  4. -Keep the ball in front of your face, and above your eyes as you release the shot.

Step 2:

Shooting against backboard or the wall with a pivot. Student starts perpendicular to their target, pivots with shooting foot to face target, takes deep knee bend and then shoots the ball.


Teaching Cues:

  1. -It is important to not lose sight of the previous step.

  2. -Idea with the pivot is to ensure student is squaring up to their shooting target.

  3. -Focussing on follow through will increase steadiness of the shot and success.

  4. -Shooter should rise up onto toes for each shot.

Step 4:

Shooting towards the basket from various positions around the basket. Idea with this step is students are simulating just receiving a pass from a teammate. Students will each have a ball, they will toss it out in front of them, pick it up as if just getting a pass, then square up to the hoop and take a shot (maybe a jump shot).


Teaching Cues:

  1. -Always pivot and square up to the basket.

  2. -Be in triple threat stance (Shoot, Dribble, Pass)

  3. -Get power from the legs (important to stress steps 1-3)

  4. -Mix up the ranges of shots (not always close shots and not always from far away)


See video example below of steps 1,2,3 and 4 of the shooting progression.